Monday, August 31, 2020

The Work-In-Progress Idli Recipe

When I was a little girl, an idli vendor used to come by every morning with a huge aluminium bucket full of steaming hot idlis and chilled coconut chutney. Each idli cost a rupee and it was served on a small banana leaf along with a generous portion of the chutney (on Sundays he would also bring masala dosa and vada, along with sambar). This was my favourite breakfast - and on countless days I would take this in my tiffin to school. On some days the kind vendor at school would pour some steaming hot sambar onto the idlis that I took from home - that was bliss! 

Over the years, I've been pretty vocal about my idli-love. Idlis are my go-to comfort food, irrespective of the time of the day and I don't think I can ever have enough of these. One time I had idlis for four consecutive meals! There's something so magical about steaming hot idlis served with sambhar and chutney - but I can have these plain too. 

However, I had never tried making these at home. This was primarily for two reasons - one, I always felt it was too much work to make the batter from scratch, especially for one person. Not that I had the right equipment needed to carry out the project either. The fact that idli needs a lot of skill didn't help either. Plus there were always enough delivery services in the neighborhood. My mom never made rice idlis at home. She makes amazing rava idlis, so I recently tried to give it a shot in my make-shift idli steamer (a covered pan with a small steel ring placed at the base and a bowl half full of batter placed on top of it). That turned out to be quite alright. I guess that's how I gained enough confidence to try and make rice idlis from scratch. The fact that I haven't found a good idli place in the neighborhood yet may have been an important consideration in this decision. 

I turned to Adith for help. Adith is my friend from Chennai who is aware of my love for idlis. Adith's mom gave him broad directions for the recipe, which he sent to me. The thing is, Adith doesn't cook either, so it was only after a couple of back and forths that I was able to get enough information to get started. I ordered parboiled rice on Amazon (none of the local stores here stock it) and waited for about 2 weeks for it to arrive. I also ordered a mixer grinder since I didn't own any. Yes, all this to be able to make idlis at home.   

I used the recipe to make the first batch of batter, which I steamed to make idlis. The result was hard idlis, which also seemed like they were undercooked. I was heartbroken! How could have I expected to make perfectly fluffy idlis at the first attempt? Adith didn't know the solution to this, but he consoled me by saying that it is common for people to not get it right even if they've been making it for ages. So if I got hard idlis in the first attempt, that was actually good progress! I didn't have the heart to steam any more idlis with the batter, so I tried making dosas out of it. However, the texture of the dosa was way too grainy - that's how I realized that the batter was way too coarse. I mentioned this randomly to a wise, elderly gentleman (I didn't know he had any knowledge about cooking), and he said that the reason that the idlis were hard could be because the batter hadn't fermented enough. He said his wife usually adds a little Eno before steaming idlis. 

So once I had recovered from my heartbreak, I made a new batch of batter. This time I ground the rice a little more before adding it to the dal paste. And I left it overnight in the container to ferment. Before steaming I added a little Eno and also about half a teaspoon of ghee (a tip I got from Upasana, another friend who is heavily invested in my idli-making endeavors). I steamed the first portion for about ten minutes, which resulted in undercooked idlis (the top was fine, but the bottom was definitely undercooked). But hey, at least it wasn't hard! After a bunch of trial and errors, I discovered that fifteen mins is what it takes, after which you need to leave it in the pan for another 5 minutes and then take it out and let it sit for another 5 minutes. I swear it takes all the restraint in my body to not take it out of the steamer and eat it immediately (obviously resulting in undercooked idlis)!    

I still haven't received perfection though. I think I need a shallower bowl/ plate which I can use in the pan (the current utensil that I use is a little deep). I also need to figure out how to ferment the batter more - I used the last bit of the batter this morning (I made it four days ago) and it seemed like the fermentation had finally happened properly. But I do know that the batter recipe that Adith's mom shared is pretty much spot on. So if you're curious, here it is:     

Take 3 cups of rice (Adith recommends parboiled rice for this) and add 1/4 methi (fenugreek seeds) to it. Soak this in a vessel overnight. Also soak 1/2 cup urad dal overnight, in a separate vessel (minimum 3 hours). I found out that if you wash both these things before soaking, that works out to be better.

The grinding process will depend on how quickly you want to use the batter. If you want to use the batter immeditely, drain the water, add a glass of buttermilk and salt and grind everything together. However, if you're not in a rush, you can follow the longer method (this is what I've been working with): 

Grind rice (leave the methi in) with a little water into a coarse batter ( it should have a slightly grainy texture). While you grind the rice, leave the dal in the fridge to chill. Once the rice is ground, keep it aside. 

Grind the dal separately - this needs to be a fine, fluffy batter.  Once this is done, mix the rice and dal together and add salt (the salt and methi will help with fermentation). Leave it overnight in a closed container for fermentation (keep it outside, not in the refrigerator). This batter can be stored in the refrigerator for 3-4 days.

I haven't had enough time to work out the sambar recipe yet, so that'd have to be shared in a separate post. I've mostly been devouring the idlis that I've made this week with some hummus (!), which has become a staple now. I do temper it with mustard seeds and curry leaves so that it feels adequately chutney-like! I'm not particularly proud, but in case you're wondering what my work-in-progress idli looks like, here's the picture:


Thursday, August 13, 2020

The No-Fail Pav Bhaji Recipe

This post is dedicated to Alka Grover, who shared this brilliant recipe. I love you! <3

Pav bhaji is my second-most preferred comfort food (after idlis). Growing up in one of the busiest localities in Kolkata, yummy pav bhaji was easily available. When I moved out of the city, finding good pav-bhaji was a pain. Most places make pav bhaji in mixed-vegetable style, with too much masala thrown in. I crave to have home-made pav bhaji that brings together sweet, sour, spicy, and tangy together beautifully in a buttery concoction. And then one day, I had the pav bhaji that Alka auntie makes and I became an instant fan! Now that I barely get to see her, she shared her recipe with me. This recipe gets recreated in my kitchen at least once a week. It takes me up to an hour to do everything and there's enough bhaji for 2-3 people. 

Here you go!   

INGREDIENTS:

Vegetables:

  • 4 medium-sized potatoes, boiled 
  • Cauliflower, peas, beans, lauki - about the same quantity as the potatoes; steamed (pro-tip: do not use carrots as it changes the taste considerably. I personally do not like the texture of laukis so I avoid that too. Also the only veggie that you absolutely must have is cauliflower)
  • 4 tomatoes, chopped (the redder the tomatoes, the lovelier would be the color of the bhaji!)
  • 1 medium-sized onion, chopped 
  • 4 cloves of garlic - peeled and finely chopped/ grated
  • 1/2 inch piece of ginger, grated
  • 1 lemon
  • Some green coriander for garnishing

Masala: 

  • 1 tsp salt (adjust as per taste)
  • 1/2 tsp ground zeera
  • 1/2 tsp ground dhania
  • 2 tsp pao bhaji masala (I only use half the quantity so that it's less spicy)
  • 1/2 tsp ground fennel seeds (optional)
Others: 
  • Oil for cooking onions
  • Butter
  • Pao!

COOKING INSTRUCTIONS:

  • Heat a little oil in a pan and add chopped onion. Fry until the onions are brown. I used to earlier use a non-stick pan but switching to a thick bottomed stainless steel pan makes the bhaji much smoother.
  • Add ginger and garlic and stir for a minute
  • Add the tomatoes and cook on medium heat for a couple of minutes. Add 1/2 tsp salt and cover with a lid so that tomatoes become a little tender.
  • Meanwhile, peel and mash potatoes and the steamed veggies. I generally grate them!
  • When tomatoes start leaving oil, add the dry masala, stir and add the veg and potatoes. Cook on slow fire. Once nicely mixed add half a cup of water (more/ less depending on the texture that you want).
  • Add 2 tsp of butter. I usually add half the quantity though! 
  • Taste and adjust as per taste. Turn off the gas and add lemon juice if you want it to be tangier. On most days I find it to be fine without the lemon juice.
  • Garnish with chopped onion, tomatoes and coriander leaves.
  • Eat with buttered toast or pao.


Wednesday, August 12, 2020

Diary of an (almost) Mountain Girl

This post has been overdue for a few weeks now. In these weeks, several thoughts about what would comprise the content of this post have churned in my head endlessly. So much so that I don't know where to start anymore. Perhaps I should start by saying that I feel at home

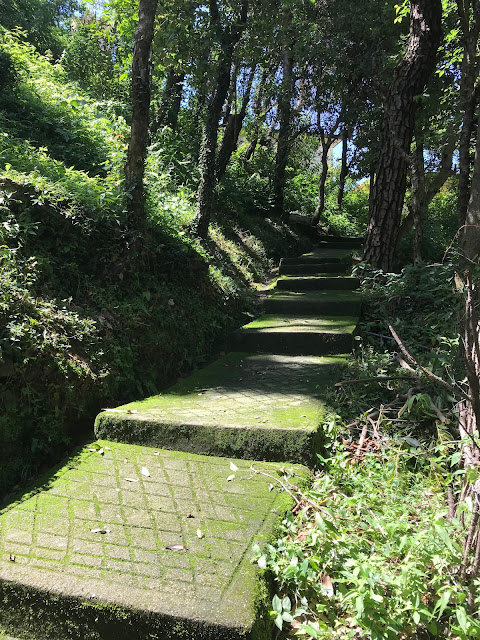
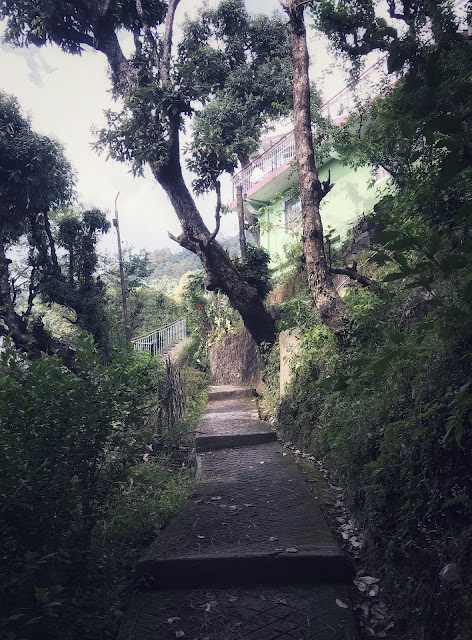
The COVID situation aside, the other huge change that has happened in my life over the last few months is that I've gone to being a mountain girl from being a city girl. I haven't considered myself to be particularly lucky, but the fact that I moved to the mountains just a couple of weeks before the lockdown is a rather compelling argument against it. After spending a miserable couple of lockdown months of being at barely operational hotels, I finally managed to find a cozy rented place. A couple of social media posts about this achievement have led to endless queries from friends and family (and ex-colleagues, and just about anyone who has seen posts). Even though I suffer from the grandma syndrome (repeating the same story over and over again with the same amount of enthusiasm), it was getting a little bit out of hand. Hence the need for this grand post. A long stairway of forty-something steps leads to the house. Although a little tiring, it's a beautiful stretch with foliage on both sides. It looks rather dreamy on a rainy day and on the sunnier days it is absolutely stunning!


During my first visit to this place, I was charmed and breathless in equal measure. So much so that it completely slipped my mind that these beautiful concrete steps would gather moss during the rainy season. This particular slip-up caused close encounters with several situations where I escaped slipping on these stairs by a whisker. On one particular instance, I decided to wear my trekking shoes (pro-tip: trekking shoes and moss aren't really on friendly terms). About halfway I froze in terror. I knew that if I took one more step I would slip and break a bone or two. After having stood there for a full five minutes (and perspiring profusely), I decided to take the plunge ahead. I didn't take a fall that day but no points for guessing that my trekking shoes have been eating dirt ever since.

Once you brave the trek up, you reach the entrance to my house. It is a part of a bigger structure which houses the landlord and his family. The roof of my house serves as terrace for the landlord’s family. The entrance to my place sometimes reminds me on hobbit houses because it is noticeably smaller than the ordinary entrances. The ceiling is also quite low, so much so that when I extend my arm I can easily touch the ceiling. I’m 5’2”, so you do the math. 

In keeping with the general feel of this hobbit house that I inhabit, almost everything in the house is small too. This is especially true of the kitchen, which has a shared wall with the entrance to the house. It’s one of the tiniest kitchens that I’ve seen so accordingly all the utensils and storage containers are also super tiny. So are the cups in which I lovingly serve instant tea to guests who come over. The rather polite people who tend to be my guests are always visible surprises at the size of the cups that I serve tea in, even though they never voice their surprise. On the days that I’m feeling fancy I take out the fancy carafe that’s just about enough to brew two cups of fancy marigold-lemongrass green tea that has become a staple in my household. The water for either kind of tea is heated in my miniature of a kettle that sits comfortably over the deep red refrigerator. This fridge has been one of my more extravagant purchases here (other than the mattress, that is, but we will come to that in a bit). 

The kitchen space is a semi-enclosed space and the same area also houses a wooden table with four chairs. In my zeal to maintain the feel of the hobbit house I nearly discarded it to bring in a table about half the size of this one, but better (financial) sense prevailed. Now this area doubles up as my workspace; the table big enough to accommodate the all-in-one printer/copier/ scanner that I can’t operate without. Serendipitously, this is also the spot in the house that has the best network. 

The best part? When I sit at the table, the glass windows open up a beautiful view of the mountains. If you stand by it, you can see the flight of stairs leading up to the house and the main road where it connects. And the Shiva temple that has recently been renovated. On particularly cloudy days, the clouds simply barge in through the windows, intruding upon my privacy in the process. Bright sunny days are a very good reminder of the privilege that I have right now. To be honest, it’s a little surreal to be living in a place as charming as this. There are days when I find myself in a moment of disbelief. It is in these moments that I take a pause, soak in all the beauty and thank my lucky stars!